
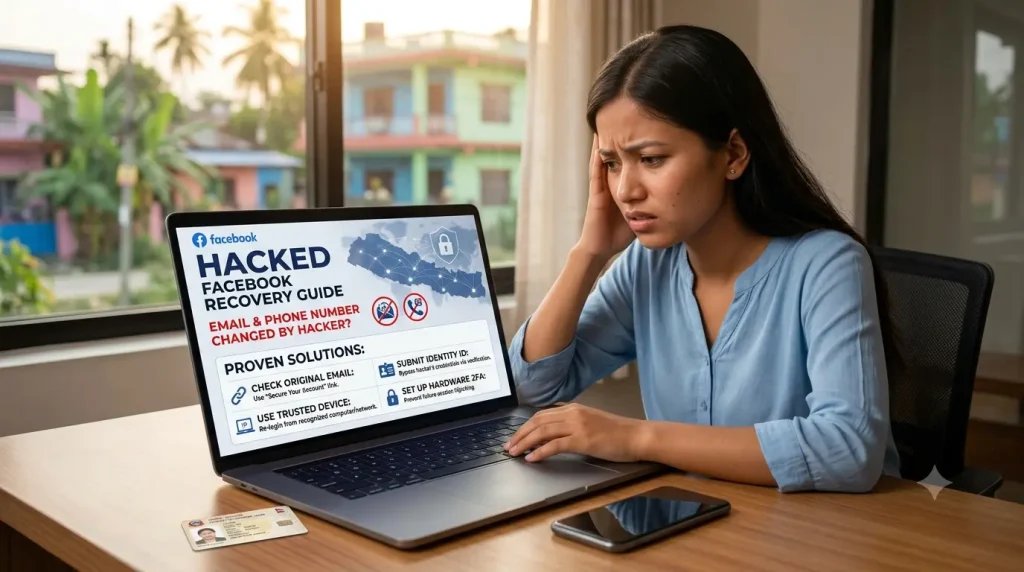
If you are dealing with a hacked facebook account and the attacker has already changed your primary email and phone number, the standard password reset options will not help you. When both recovery options are gone, you are trapped in a loop that constantly routes verification codes straight to the hacker.
To understand how to beat the hacker, you have to understand what happened behind the scenes. When an attacker takes over an account, they perform a sequence of actions designed to isolate the profile:
- They change the primary email address to a burner or an encrypted email service.
- They remove your phone number to disable SMS recovery.
- They often activate an Authenticator App (TOTP) or download 2FA backup codes, ensuring that even if you guess the password, you cannot pass the second security gate.
If you attempt a basic recovery by clicking “Forgot Password,” Facebook’s server looks at the current state of the account database, sees the hacker’s contact info, and offers to send a code there. Do not continue entering information into this standard loop. Repeatedly requesting codes to the hacker’s email can cause Meta’s automated anti-spam systems to temporarily flag your IP address, locking out even legitimate recovery attempts for 24 to 72 hours.
Recommended Read: Step-by-Step Guide to Recovering a Hacked TikTok Account Without Email or Phone
Instead, you must utilize Meta’s secondary and tertiary authentication layers.
Phase 1: Bypassing a Hacked Facebook Account via the Legacy Email Link (The 24-Hour Window)
When a primary security credential (like an email or phone number) is changed, Meta’s security system triggers an automated, high-priority safety mechanism. It sends an alert to the original email address notifying you of the modification.
This notification contains a cryptographically signed, time-sensitive token designed to instantly reverse unauthorized changes on your hacked facebook account.
Step-by-Step Execution:
- Access Your Original Inbox: Log into the email account that was associated with your Facebook profile right before the hack.
- Isolate the Security Alert: Search your inbox, spam, junk, and trash folders for messages sent from
[email protected](this is Meta’s official, authenticated email domain). Look for subjects like “Facebook password changed,” “Primary email changed,” or “An email address was removed from your account.” - Locate the Override Token: Open the email. Inside the body of the message, look for a specific phrase that says: “If you didn’t do this, please secure your account.“ or “Click here to undo this change.“
- Trigger the Reversion: Click that link. If executed within the expiration window (typically 24 to 48 hours from the time of the hack), this link bypasses the new password and contact info. It signals to Meta’s servers that an active hijacking event is occurring, freezes the account’s access points, and allows you to establish a brand-new, secure email address immediately.
⚠️ Critical Security Warning: Ensure the email is genuinely from
facebookmail.com. Attackers sometimes send spoofed phishing emails that mimic these alerts to steal your remaining credentials or identity documents. Always inspect the sender’s full header address before clicking links.
Phase 2: Using Trusted Devices for Hacked Facebook Recovery
If the email link has expired, or if the hacker successfully deleted the notification from a compromised email inbox, your next line of defense is Device and Network Attestation.
Meta’s security servers track hardware profiles, browser signatures, and geographic IP allocations to build a “trust profile” for every user account. When you try to recover an account from an entirely new device or an unfamiliar location, the system treats the request with high suspicion and enforces the strictest credential requirements (which the hacker now controls).
To lower the server’s security threshold and expose manual recovery options, you must match your historical trust profile precisely.
The Attestation Checklist:
- The Right Hardware: You must use the physical device (smartphone, laptop, or desktop) that you used most frequently to access the profile before dealing with a hacked facebook security breach.
- The Right Browser: If you used a laptop, use the exact same browser (Chrome, Safari, Firefox, Edge) you normally use. Do not use Incognito or Private Browsing mode, as this wipes out the local storage cookies that Meta’s recovery scripts look for.
- The Right Network: Connect to the exact Wi-Fi network or local internet access point (home, work, or school) where you routinely accessed your account. Do not use a VPN, a public hotspot, or mobile data if you primarily browse on home Wi-Fi.
Step-by-Step Execution:
- Clear your mind, sit at your usual desk or room, and open your trusted device and browser on your trusted network.
- Navigate directly to the specialized recovery endpoint:
[https://www.facebook.com/hacked](https://www.facebook.com/hacked) - Click the button labeled “My Account Is Compromised”.
[Target: facebook.com/hacked]
        │
        ├──► [Matches Trusted Device/IP Cookie] ──► Exposes "No Longer Have Access" Portal
        │
        └──► [Unrecognized Device/VPN On] ──────► Trapped in Hacker's Credential Loop
- The system will prompt you to identify your account. Because the hacker changed your email and phone number, do not type a phone number or email.
- Instead, type your Full Name exactly as it appeared on your profile, or enter your Profile Username.
- How to find your username: Ask a friend to look up your compromised profile on Facebook. The string of text or numbers at the very end of the URL (e.g.,
[facebook.com/username](https://facebook.com/username)) is your unique username identifier. Enter that into the search box.
- How to find your username: Ask a friend to look up your compromised profile on Facebook. The string of text or numbers at the very end of the URL (e.g.,
Phase 3: Bypassing the Hacker’s Gate via Manual ID Submission
Once your account is identified using the steps above, Facebook will display the obscured recovery options (showing masked versions of the hacker’s new email or phone number).
If you are on a highly trusted device, a small, critical link will appear at the bottom or side of the prompt box.
Step-by-Step Execution:
- Look for and click a link that says “No longer have access to these?” or “Try another way” -> “I cannot access my email address.“
- If the device attestation from Phase 2 was successful, Meta’s system recognizes the machine history and opens the hacked facebook manual override screen titled “How can we reach you?“
- Provide a Clean Point of Contact: Enter a completely fresh, functional email address.
- Important: This email must have never been associated with any Facebook, Instagram, Threads, or Meta Horizon account in the past. Create a brand-new Gmail or ProtonMail account specifically for this recovery pipeline if necessary.
- Click Continue.
The system will now redirect you to the Upload Your ID portal. This step completely cuts out automated loops and hands the verification process over to Meta’s identity operations team.
Phase 4: Navigating the Identity Verification Portal Successfully
The identity submission system relies heavily on computer vision algorithms to verify the authenticity of documentation before routing it to human review teams. If the automated scanner flags your upload as blurry, cropped, or suspicious, your request will be rejected instantly with a generic error message.
Follow these strict parameters to ensure your document passes the first time:
Acceptable Document Types
Meta accepts a wide range of official documents to verify a hacked facebook identity request, but you should prioritize these for the fastest turnaround times:
- Passport
- Driver’s License
- National Identity Card (e.g., Citizenship Card or National ID)
- State or Voter Identification Card
Note: If you do not possess government-issued photo ID, Meta allows you to upload two forms of non-governmental identification showing your name matched with your birth date or photo, such as a utility bill combined with a school ID card.
Technical Upload Protocols:
- Lighting: Place your ID flat on a dark, non-reflective surface in a well-lit room. Avoid direct overhead lights that create a white glare patch on the laminated surface of the card.
- Framing: Ensure all four physical corners of the ID card are visible within the camera viewfinder interface. Do not crop the edges or hold the card between your fingers, as covering any part of the border can trip fraud detection scripts.
- Focus: Ensure that your name, birthdate, photo, and the document expiration date are perfectly legible and sharp.
Once uploaded, click Submit.
What Happens Behind the Scenes: The Verification Timeline
After submission, your case enters Meta’s security queue.
[ID Submitted] ──► [AI Validation Core] ──► [Human Match Verification] ──► [Direct Access Link Issued]
Specialized review systems cross-reference the name and date of birth listed on the submitted ID card against the historical profile logs of the account. The system specifically checks the records prior to the date the hacker altered the credentials. It also utilizes facial recognition vectors to match the photo on your physical ID against public uploads and profile pictures located within the account history.
The Waiting Period:
- Timeline: The process typically takes anywhere from 48 hours to 5 days depending on ticket volumes.
- The Result: If approved, you will receive an email at the brand-new, clean email address you provided in Phase 3.
- The Key: The email will contain a direct login bypass link and a temporary alphanumeric password.
Phase 5: Reclaiming and Hardening Your Profile
The moment you click the recovery link sent to your new email, you will bypass all passwords and the hacker’s 2FA setup. However, the attacker may still have active login sessions open on their devices. You must work quickly to completely sever their access within the first five minutes of reclaiming the account.
Follow this sequence immediately upon logging back in:
- Purge the Attacker’s Access Points:
- Navigate to Settings & Privacy > Settings > Accounts Center > Password and Security > Where you’re logged in.
- Review the list of active devices. Click “Select devices to log out”, check every malicious machine connected to the hacked facebook profile, and click Log Out.
- Clean the Contact Information:
- In the Accounts Center, go to Personal Details > Contact Info.
- Delete the hacker’s email address and phone number completely. Ensure only your new email address is designated as the primary account holder.
- Demolish and Rebuild Two-Factor Authentication (2FA):
- Go to Password and Security > Two-Factor Authentication.
- If the hacker turned on 2FA, Turn It Off first to clear their authenticator app registry keys.
- Turn 2FA back on immediately. Do not rely solely on SMS/Phone numbers, as phone numbers are vulnerable to SIM-swapping attacks. Instead, select Authentication App and link it to an app like Google Authenticator or Microsoft Authenticator on your personal phone.
- Download Recovery Codes: Generate and save Meta’s 8-digit offline recovery codes. Print them out or write them down in a secure physical location. These codes allow you to bypass 2FA instantly if you ever lose your phone.
- Review App Permissions and Linked Accounts:
- Attackers frequently link a secondary account (like an unauthorized Instagram profile or a rogue third-party developer app) to maintain a back-door entrance into your Facebook profile.
- Check Accounts Center > Accounts and remove any unknown profiles.
- Go to Settings > Apps and Websites and revoke permissions for any unfamiliar software.
Proactive Prevention: Safeguarding Against Session Hijacking
Many modern account takeovers do not happen because the hacker guessed your password. Instead, they occur via Session Hijacking (Cookie Stealing). This happens when you accidentally download a malicious file, click a compromised link, or use cracked software. The malware copies the encrypted active login session tokens directly out of your web browser’s storage and sends them to the attacker, allowing them to instantly duplicate your logged-in state without ever needing your password or 2FA prompt.
To protect yourself moving forward:
- Use Dedicated Identity Authenticator Apps: Rely on app-based 2FA codes rather than text messages.
- Isolate Your Browsing: Avoid saving critical account passwords natively within the browser autofill database unless it is protected by a master password device lock.
- Audit Active Sessions Regularly: Make it a habit to check the “Where you’re logged in” screen once a month to ensure no unauthorized devices have established a silent anchor inside your profile ecosystem.
Frequently Asked Questions (FAQ)
What if I don’t see the “No longer have access to these?” link?
his is the most common hurdle. If this link is missing, it means Meta’s security system does not recognize the device, browser, or network you are currently using. To force the link to appear:
Disconnect from any VPNs or proxy servers.
Switch to the mobile phone or computer you used most frequently to log into Facebook before the hack.
Try switching from cellular data to your home Wi-Fi network (or vice versa) to match your historical IP footprint.
If you recently cleared your browser cache or cookies, try using the official Facebook mobile app on a recognized phone instead of a desktop browser.
The hacker set up 2-Factor Authentication (2FA). Will my uploaded ID bypass this?
Yes. When you submit a valid government ID through the official recovery portal and Meta confirms your identity, the recovery link they send you acts as a primary master key. Clicking that link bypasses both the hacker’s changed password and their active 2FA checkpoints, allowing you direct access to the account center to turn off their authenticator keys.
Facebook rejected my ID submission. What should I do?
If your ID was rejected, it is usually due to automated computer-vision flags rather than a manual refusal. Try these steps for a second submission:
Ensure the ID is lying completely flat. Do not hold it in your fingers, as covering any part of the border triggers automated fraud rejections.
Eliminate overhead glare. Move away from bright ceiling lights and use diffused, indirect natural light instead.
Take the photo on a starkly contrasting, dark background so the automated system can cleanly detect all four corners of the card.
Make sure the name and birth date on the ID closely match the historical details on your profile before the hacker altered the account.
Can I use a brand-new phone or computer to recover my account?
It is significantly more difficult, but not impossible. If your original devices are broken or lost, you will not have the required trust cookies. In this scenario, your best option is to access the [facebook.com/hacked](https://facebook.com/hacked) endpoint using a highly trusted network location—such as the Wi-Fi network at your home or workplace where the account was active for months. The geographic IP block data can sometimes substitute for missing device cookies.
How long does Meta take to review an uploaded identity document?
The verification timeline fluctuates based on global ticket volume. On average, the automated preprocessing and subsequent manual review take between 48 hours and 5 days. If you haven’t received a response after a week, check the spam folder of the new email address you provided during the submission process. Do not submit multiple conflicting tickets during this window, as doing so can reset your placement in the queue.
My account was completely deleted by the hacker. Can it still be recovered?
When an account is deleted, Meta places it into a 30-day grace period before the data is permanently purged from their production servers. If the hacker initiated a deletion, logging in via the legacy email link token (Phase 1) or completing the identity verification workflow (Phase 4) within that 30-day window will instantly cancel the deletion request and restore the profile.