
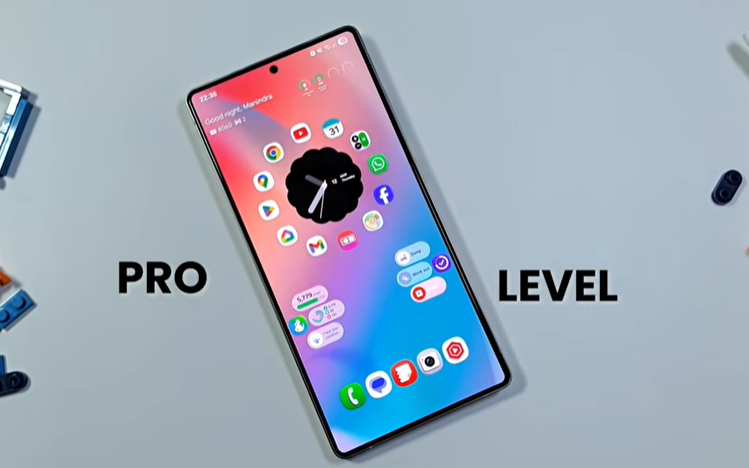
Samsung’s One UI offers a massive library of features right out of the box, but if you want to move past the basic setup and truly unlock your phone’s potential, you need to dive into advanced customizations. By leveraging specialized modules, custom gesture setups, and fine-tuned camera parameters, you can transform your Galaxy device into a high-performance productivity machine.
If you are exploring more device upgrades, check out our latest mobile reviews and tech guides on Phadera to keep your smartphones running at peak performance.
Here is a comprehensive guide to configuring your Samsung phone like a pro.
1. Ergonomics & Advanced Gestures for Your Samsung Phone
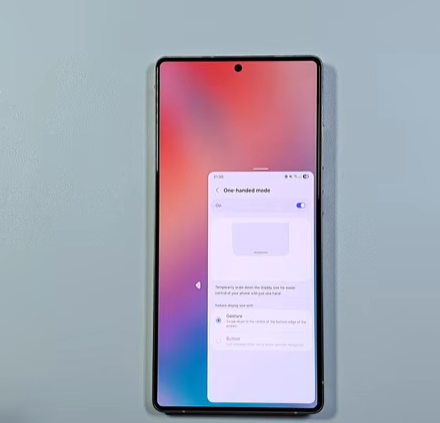
Large displays make one-handed navigation challenging. You can solve this by setting up a dual-layer gesture system using built-in settings and specialized power tools.
Advanced One-Handed Mode
- Navigate to Settings > Advanced features > One-handed mode and toggle it on.
- Since you are likely using swipe gestures for navigation, this automatically maps a quick, downward swipe near the bottom edge of the screen to shrink the display interface.
- To return to full screen, simply tap anywhere in the empty area outside the active window.
One Hand Operation + (Deep Customization)
For next-level control, install the One Hand Operation + app (part of the Good Lock ecosystem ecosystem). This utility allows you to map multiple transparent handles on the left and right edges of your screen.
- Multi-Handle Setup: Enable up to four handles to expand your touch zones.
- Gesture Mapping: You can assign distinct actions to both short swipes and long swipes (diagonal up, horizontal, diagonal down).
- Quick Tools Menu: Map one of your gestures to open Quick Tools. This launches a highly customizable overlay grid where you can place up to 12 distinct system shortcuts or toggle switches, allowing you to reorder them based on your daily usage frequency.
2. Advanced Home Screen Customization on a Samsung Phone
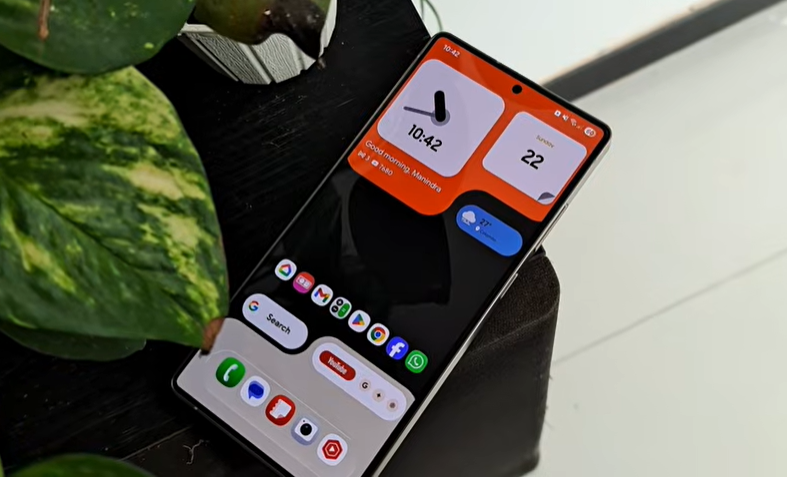
To move beyond standard grid layouts and default icons, utilize dedicated interface modules to gain granular control over your workspace.
[Good Lock Ecosystem]
   ├── Home Up     --> DIY Home Screen (Free-form placement, locking, grouping)
   └── Theme Park  --> Advanced Icon Design (Emboss/glass effects, palette matching)
Free-Form Layouts via Home Up
Install the Home Up module inside the Good Lock application.
- Open Home Up, select Home screen, and enable the DIY home screen option.
- Return to your home screen, tap and hold an empty space, and select the newly unlocked DIY option.
- This bypasses the rigid grid restrictions, allowing you to place app icons and widgets precisely anywhere on the canvas.
- Utilize the built-in alignment and adjustment tools to keep your layout uniform, and use the lock and group functions to secure your layout against accidental layout changes.
Custom Icon Engineering via Theme Park
If standard Play Store icon packs don’t match your aesthetic, the Theme Park module allows you to build a cohesive visual theme from scratch.
- Go to the Icon tab and tap Create New.
- Color Matching: Apply shapes and colors to your icons. It is best practice to set your wallpaper first, then select colors that complement the background palette.
- Styling Effects: Apply advanced visual variations such as Glass, Emboss, or Gradient. An Emboss style offers a particularly clean, tactile aesthetic for modern setups.
3. Professional Samsung Phone Camera Calibration
The default Samsung Phone camera configuration prioritizes general usability over absolute control. Installing the Camera Assistant module unlocks hidden processing options that prevent over-processed images and improve shooting speeds. . (If you love granular, pro-grade mobile camera setups, check out our in-depth Sony Xperia 1 VIII review on Phadera for another approach to manual mobile photography).
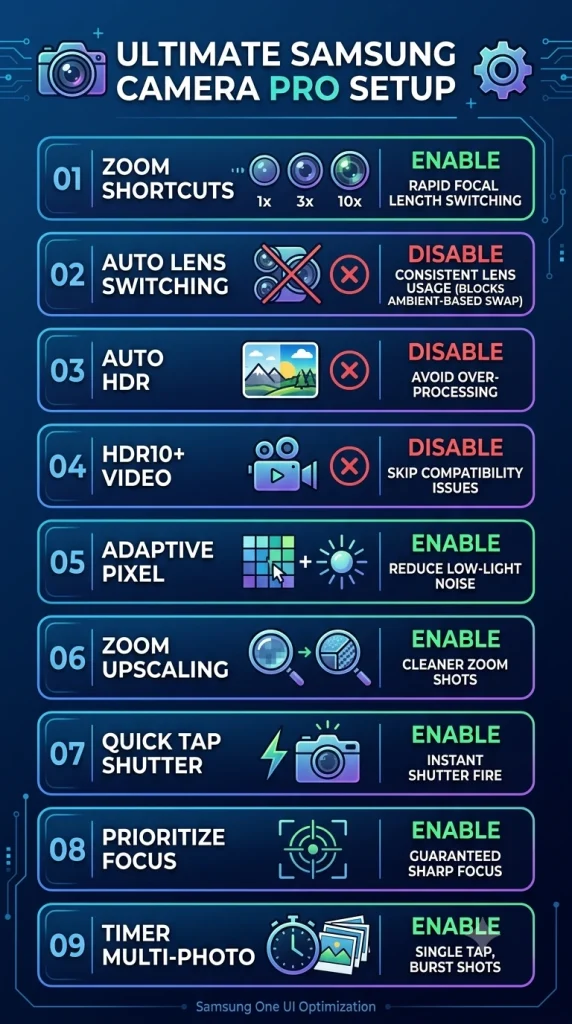
Enable Zoom Shortcuts: Activate this to quickly jump between precise focal lengths (e.g., 1x, 3x, 10x), ensuring faster operation and better framing efficiency.
Disable Auto Lens Switching: Turning this off prevents the camera from automatically selecting a lens based on lighting conditions, giving the photographer complete control over which sensor is active for consistent perspective.
Disable Auto HDR: Switch this off to eliminate aggressive computational HDR processing. This results in more natural contrast and realistic lighting that closely resembles the scene as the eye sees it.
Disable HDR10+ Video: Deactivating this prevents encoding videos in the specialized HDR10+ format, thereby avoiding common playback compatibility issues on non-supported screens or during standard editing.
Enable Adaptive Pixel: This feature merges high-resolution data with sensor binning to significantly improve image clarity and reduce digital noise when shooting in dim environments.
Enable Zoom Upscaling: Activate this to apply advanced digital upscaling to magnified shots, resulting in cleaner and sharper edges rather than blurry, pixelated digital zoom results.
Enable Quick Tap Shutter: Turn this on to capture the photo the exact instant your finger touches the button, rather than waiting for the finger’s release, ensuring you don’t miss dynamic moments.
Enable Prioritize Focus: This setting instructs the system to confirm that the subject is sharp and in perfect focus before completing the capture, prioritizing image crispness over pure shooting speed.
Enable Timer Multi-Photo: Configure this to capture a sequence of rapid burst photos with a single tap after the timer expires, making it ideal for self-timer group shots or self-portraits.
4. Galaxy AI & Samsung Phone System Optimization
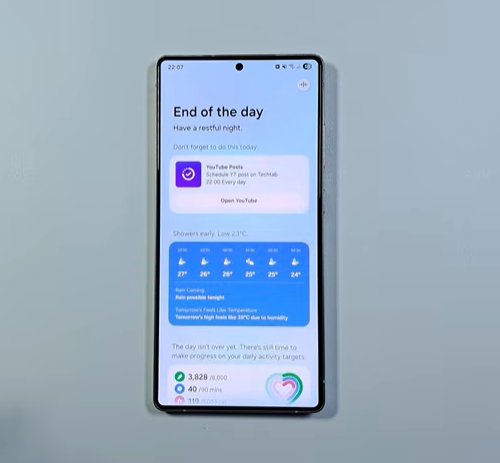
Samsung’s integrated AI toolkit provides excellent productivity enhancements, but running every background utility simultaneously can impact system performance and draw unnecessary power. If you want to dive deeper into game optimization, read our ultimate guide to mobile gaming performance on Phadera.
Streamlining Background AI
Review the active features under Settings > Galaxy AI. Deactivate any specialized tools that do not align with your daily routine. Reducing background AI processes frees up processor overhead and extends daily battery life.
High-Value Productivity Features to Enable
- Now Brief: Provides useful, contextual summaries right when you need them.
- AI Select: Map this function to an edge panel handle or a custom gesture within One Hand Operation +. It allows you to instantly grab text or numbers from images or locked applications and immediately pop up context-specific suggested actions (like dialing a number or mapping an address).
- Writing Assist: Accessible globally across input fields, this engine allows you to instantly analyze grammar, change conversational tones, or perform real-time translations.
5. Advanced Notification & Security Tactics for Your Samsung Phone
To finish your pro setup, modify these advanced system parameters to ensure you never miss critical information while safeguarding your physical data security. For more security tips, check out our detailed guide on Android privacy and security settings on Phadera.
Granular Notification Controls
Navigate to Settings > Notifications > Advanced settings to adjust these key workflows:
- Show Snooze Button: Adds a small bell icon to incoming notifications. Tapping it removes the alert from your panel and reschedules it to reappear after a designated time frame, working exactly like an alarm snooze.
- Repeat Notification Alerts: Essential for critical communications. You can select specific apps (like phone, work chat, or security alerts) to repeatedly ping you at set intervals until you explicitly dismiss the notification.
Activating Lockdown Mode
For environments where biometric security might be compromised against your will, enable Samsung’s hard-lock protocol.
- Navigate to Settings > Lock screen and AOD > Secure lock settings.
- Toggle on Show lockdown option.
- Now, when you long-press the physical power button to open the power menu, a new Lockdown Mode button will appear.
Security Note: Activating Lockdown Mode instantly blocks all biometric authentication methods (fingerprints and facial recognition) and suppresses lock screen notification contents. The phone can only be decrypted using your secure alphanumeric password or PIN code, ensuring absolute device protection.
FAQs
Why does my Samsung phone refresh rate drop to 60Hz even with Adaptive Motion Smoothness enabled?
Samsung’s Adaptive refresh rate automatically drops to 60Hz or lower when displaying static content, low-light environments, or inside non-supported apps to save battery. If it gets stuck at 60Hz permanently, disable Power Saving Mode or turn off Processing Speed restrictions in Settings > Battery.
Does keeping RAM Plus (Virtual RAM) enabled slow down Samsung Galaxy phones?
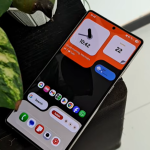
Yes, on high-end Galaxy models with 8GB or 12GB physical RAM, RAM Plus can cause slight UI micro-stutters. Because virtual memory uses storage read/write speeds—which are significantly slower than physical RAM—turning RAM Plus off (Settings > Device Care > Memory) often yields smoother animation performance.
How do you completely turn off Samsung’s AI performance throttling without rooting?
You can bypass Samsung’s Game Optimizing Service (GOS) throttling by enabling Alternate Game Performance Management. Go to Game Launcher > Game Booster Settings > Labs, and toggle on Alternate Game Performance Management. This unlocks higher thermal thresholds for demanding games at the cost of slight battery draw.
What is the best battery protection setting on Samsung One UI for long-term battery health?
The Basic or Adaptive Battery Protection setting offers the best balance. Setting Protection to Maximum caps charging at 80% to minimize chemical degradation, which is ideal if you keep your phone plugged in overnight, while Adaptive charges to 80% and finishes reaching 100% right before you wake up.